Painting without lines | Tutorial
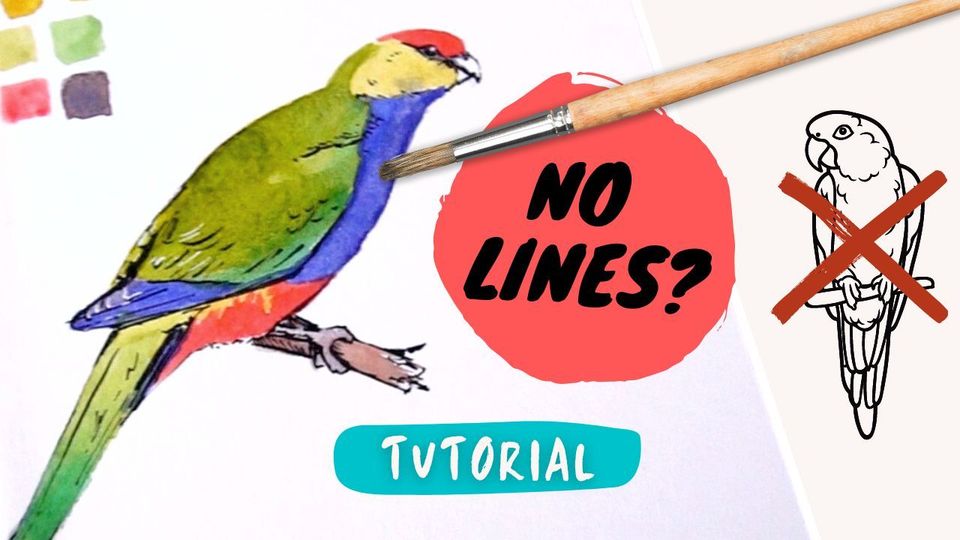
In this tutorial I want to share a technique I tried recently that surprised me with how accurately I could paint a red-capped parrot without using lines, while saving time in the process.
Watch the video version on YouTube:
It’s a technique called direct watercolour that was coined by Marc Taro Holmes, an urban sketcher. Essentially you draw directly on the paper with paint, bypassing the underlying sketch, whether that’s in pencil or pen.
Benefits of direct painting
So why would you do this? Isn’t the underlying drawing supposed to be a scaffold for the painting? The skeleton upon which you build and thereby avoid making perspective and anatomical mistakes? It’s the planning phase, so why would you throw that out and risk a failed painting?
Well it’s certainly faster because you cut out the linework stage. If you believe you should spend at least as much time on the drawing as the painting then this would save 50% of your time. It also trains your eyes to see shapes like an artist does. This means you can identify parts of an image that are the same value or colour, rather than be restricted by outlines. As a result your paintings will become more accurate and you will fall less often into the trap of drawing what you think is in front of you instead of what you actually see.
Red-capped parrot
I chose a red-capped parrot (purpureicephalus spurius) for two reasons; firstly I’d seen one on my recent walk and wanted to add it in my journal and secondly because it’s ideal for breaking into colour-based shapes for this technique. I think parrots are an excellent subject for practicing identifying shapes by colour because of their bright, contrasting plumage.
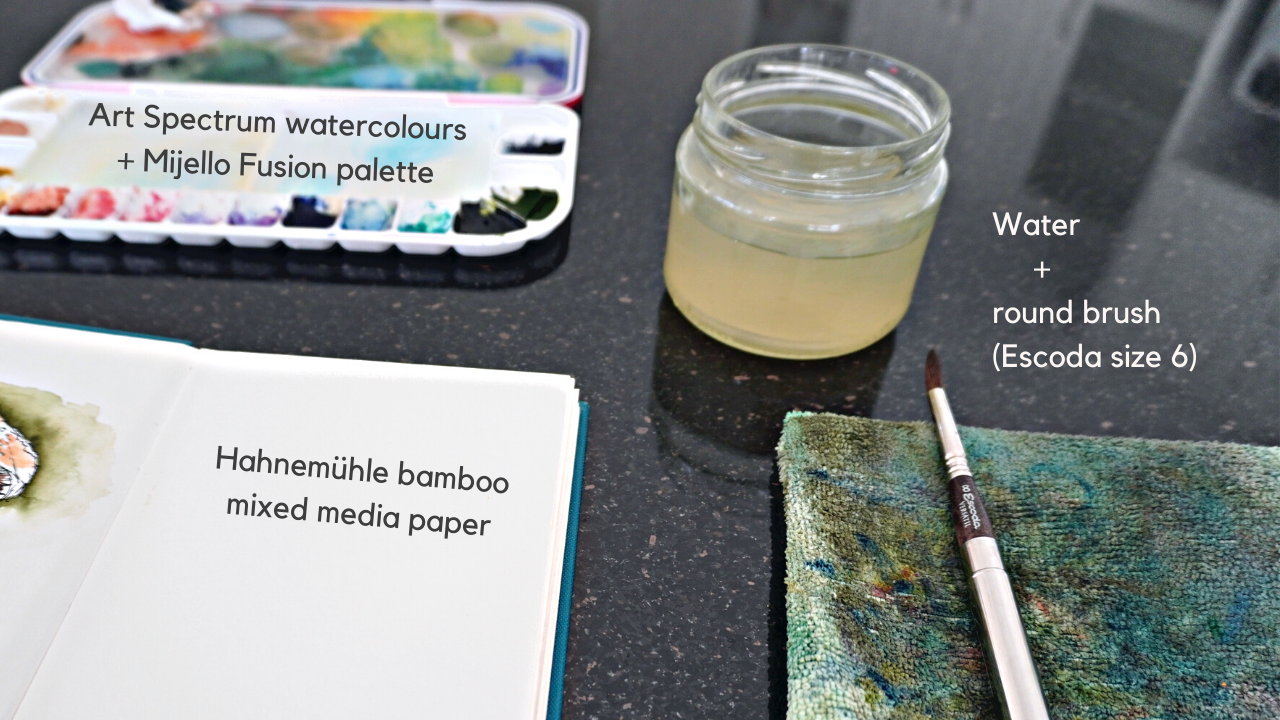
Materials
You will need a brush, paint and paper with some water and paper towel or a cloth for wiping your brush.
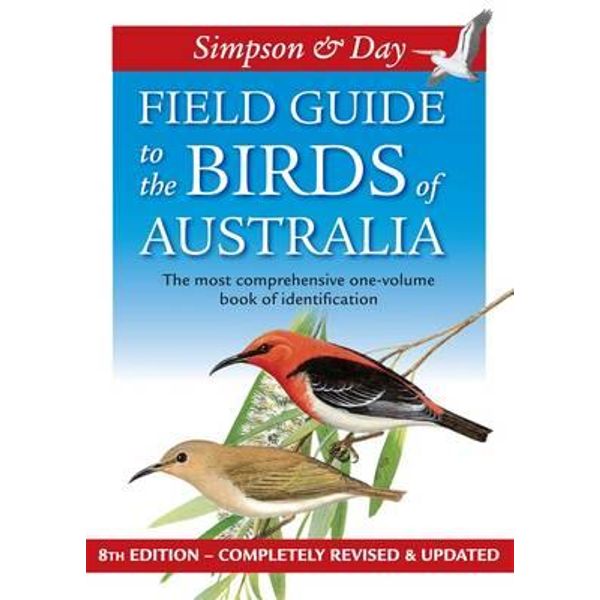
The image I was referring to came from Field Guide to the Birds of Australia - 8th Edition by Ken Simpson & Nicolas Day

Here is a similar photo © Peter Lowe from Macaulay Library you may be able to refer to for your own personal use:
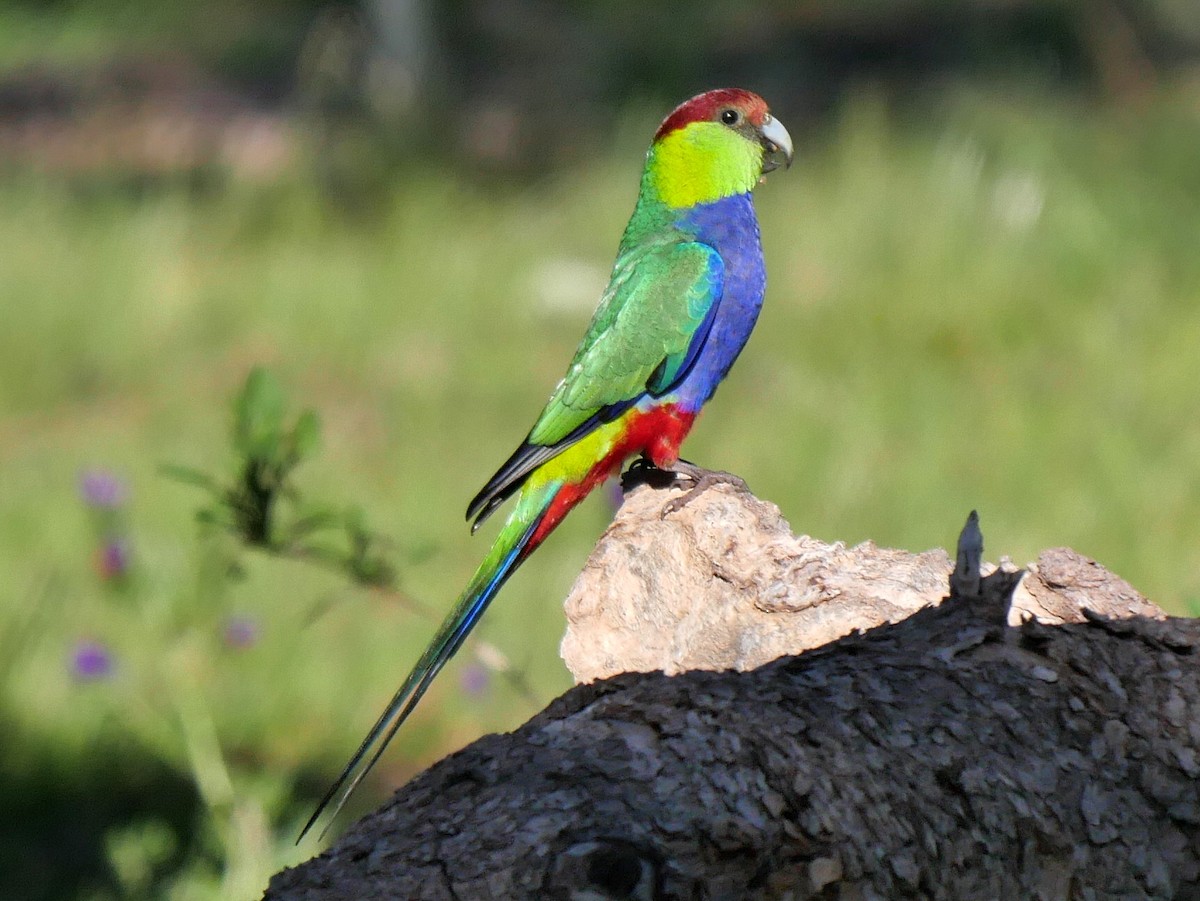
You can use any parrot or image for this technique - it will work with landscapes too!
Tutorial steps
Firstly let's separate the parrot into 8 shapes:
- the red cap and lower abdomen
- lime yellow cheek and a tiny part under the wing
- the blue breast and wingtips, and finally
- two green patches for the back and tail
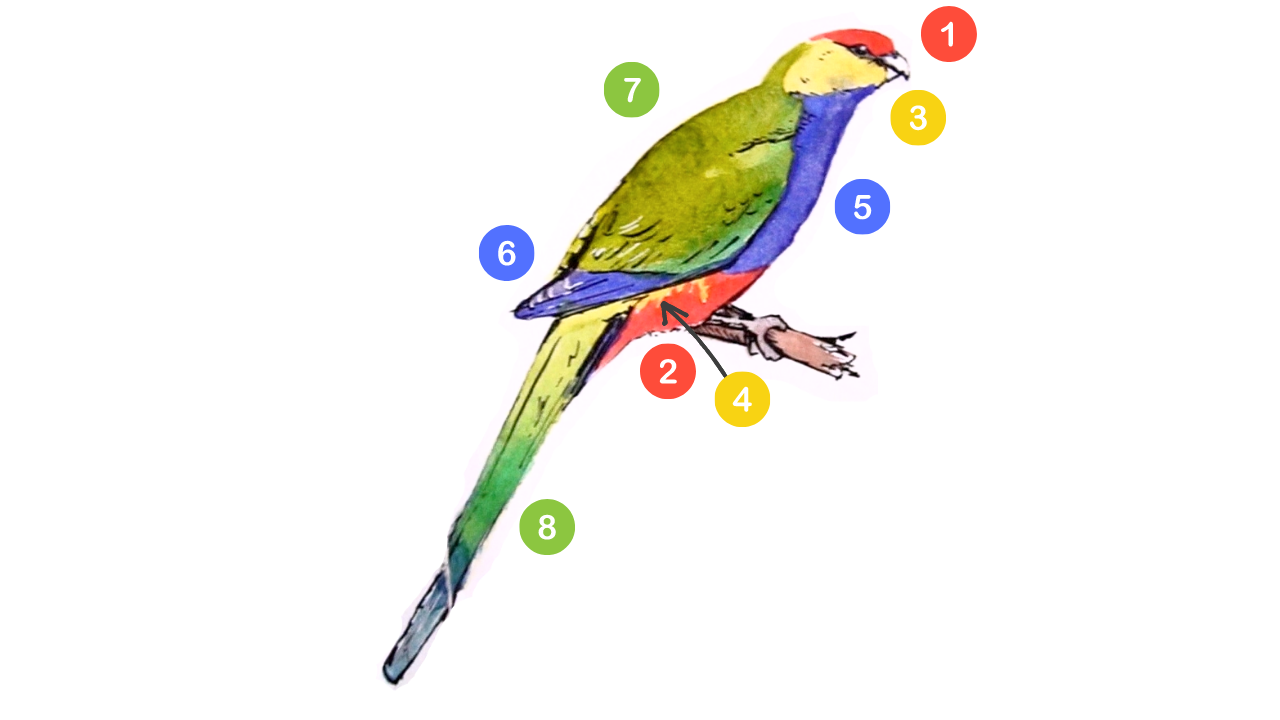
We’ll paint each colour piece separately, combining them just like a puzzle. The key here is to keep the number of puzzle pieces to a minimum so that it doesn’t get complicated. You can add detail at the end.
Start with a dilute wash and with the lightest colours like yellow first. This way you can adjust with another layer if needed.
Step 1 - First shapes
I like to start with the head but of course you can begin wherever you want. The yellow cheek is like a rounded, curved triangle. Even though there is another yellow section we’ll do that later so that its in the correct position, as guessing it now might lead to a very squat or stretched parrot!
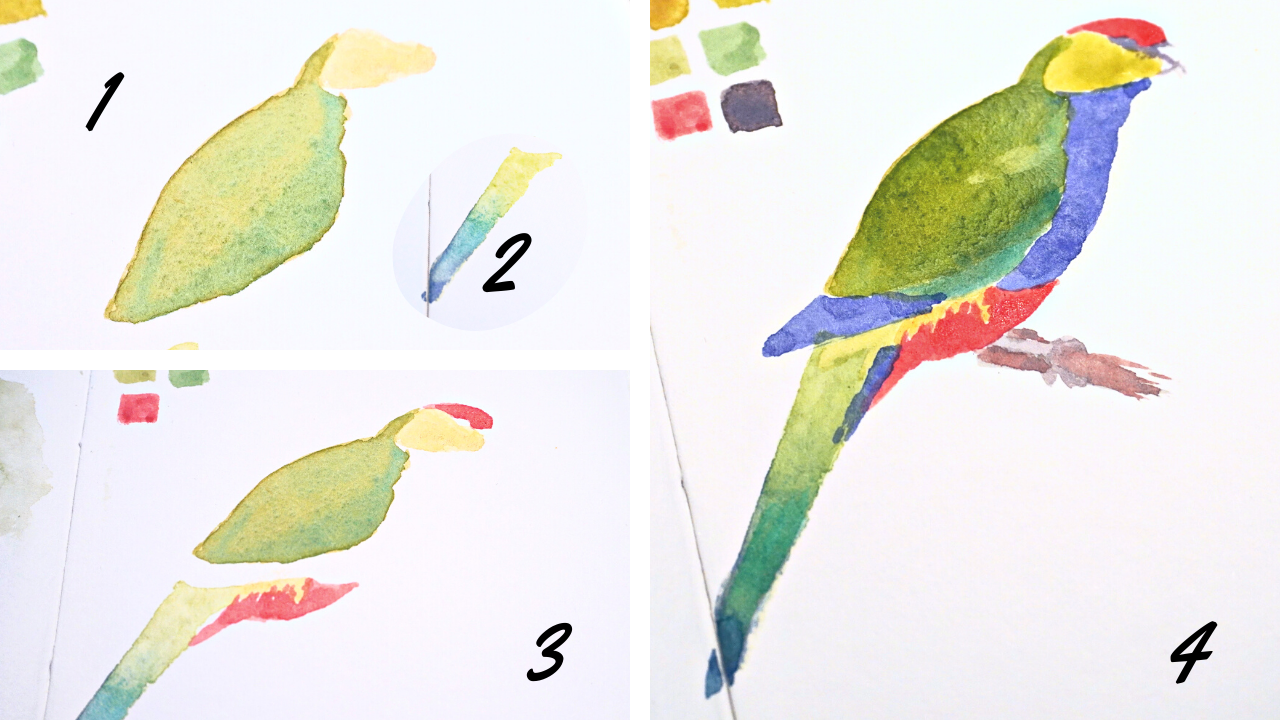
After the yellow cheek move onto the green back and wing. There’s a thin sliver at the back of the head, next to the yellow cheek. Sketch the shape by paying attention to the angles and the starting and end points relative to other shapes.
Step 2 - Tail
Once the back is filled in leave a space for the blue wingtips and create a long thin triangle for the tail, its angle following on from the back. While the tail is still wet add in blue at the bottom tip so that the tail gradually changes colour from green to blue.
Step 3 - Lower abdomen and red cap
Now we can slot in the yellow lower abdomen so that it interlocks next to the base of the tail. In this case I don’t mind if the shape is a bit bigger than it needs to be because its easy to cover up with a darker colour. While that dries add the red cap, leaving space for the eye and beak then move down to add the red in the lower abdomen.
I noticed here that the green wing shape needs to be expanded a bit so that the yellow is against it without a gap. I fixed that by adding another layer of green and also add a touch of blue to the wing edge. While the paint is still wet, use a dry brush to lift some paint where the shoulder is so that it leaves a lighter patch there.
Step 4 - Blue breast and wingtips
Then the blue breast and wingtips can be added and this is where it really feels like you’re fitting together puzzle pieces and can see it coming together.
Final touches
Add the feet and branch in a brown and grey (mixed from the blue, red and yellow). Around the eye and the edges of the beak put in a bit of diluted black.
Once all the shapes have dried you can go back and layer more to adjust the colour vibrancy and some shadow to give it 3D form. Finally, add pen details with only a few marks here and there to suggest the feather shapes, as that’s enough to make it recognisable.
Conclusion
This technique is very fun despite the fear of creating something without an underlying drawing. You can apply this technique with landscapes and urban scenes too. It’s honestly easier than it seems and you might be as surprised as I was at how well it comes together.
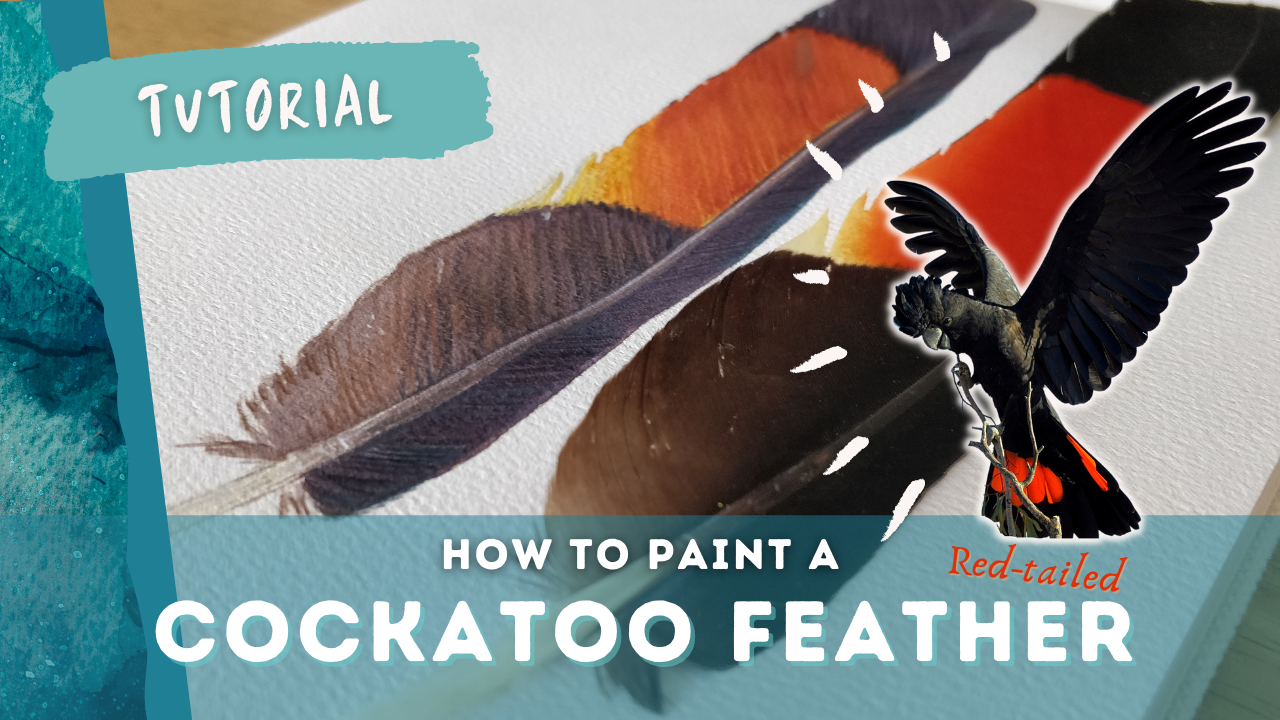
If you liked this you might be interested in my tutorial on how to paint a feather from a red-tailed black cockatoo:

Member discussion